|
|
|
|
|
|
|
|
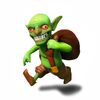
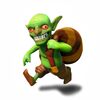
| Level 1 & 2
|
| Level 3 & 4
|
| Level 5
|
| Level 6
|
- Summary
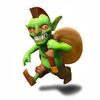
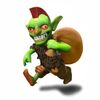
- The Goblin's appearance is that of a small, green creature with
large pointy ears, red eyes with green pupils and a red-tipped nose.
Goblins wear brown pants and shoes. They also have a large sack,
ostensibly for carrying resources stolen from your enemy.
- The Goblin is the fastest ground unit in the game. Their first target is Resource Buildings, making them the ideal troop to deploy if your primary concern from a raid is collecting resources.
- Goblins deal double damage to resource buildings (Gold Mines, Elixir Collectors and storages for each). This means that they deal more than twice as much damage as Barbarians and three times as much as Archers to these types of buildings. The tradeoff is their relatively low health, which is higher than an Archer but lower than a Barbarian.
- Because the nature of the character is to attack resource
buildings first (ignoring all defenses) they can be vulnerable to attack
and should not be deployed without another type of troop (such as the Giant) for support.
- Offensive Strategy
- Goblins are great for stealing resources. First, use Wall Breakers to clear a route to Storages and Mines/Collectors. Then, use Barbarians, Giants or any other higher-health units to distract Mortars and Wizard Towers while the Goblins deplete the resources. Or you can simply destroy the splash-damage defenses first.
- A Goblin's greatest weakness are splash-damaging structures (i.e. Wizard Towers, Mortars)
as they group together. To combat this, send in Goblins in waves rather
than spawning them all at once. Alternatively you could send in Giants and Barbarians and let them serve as distractions while the Goblins do the rest.
- Another good strategy is to place a couple of goblins when the
defenses are destroyed to help clean up any remaining buildings before
time runs out.
- Goblins are excellent at triggering Traps (especially Bombs), as their movement speed can allow them to get out of range before it detonates. This is especially helpful in the Single Player Campaign where there are often a large number of bombs in predictable places.
- Defensive Strategy
- Although generally not viewed as the best defensive troop, Goblins are still useful as Clan Castle troops. As there are no resources to target, Goblins will attack the enemy very quickly compared to the other troops.
- Goblins have the highest damage of any of the Tier 1 Units and
can engage the enemy units quickly due to their fast movement speed.
They are particularly proficient at taking out small numbers of Giants on defense.
- When designing your base to defend against Goblins, it is useful to place your Defenses strategically to cover all resource buildings. Most importantly, make sure your Wizard Towers and Mortars are within range, as otherwise Goblins will make short work of your Resources.
- Upgrade Differences
- At level 5, goblins gain a red Mohawk.
- At level 6, goblins gain a red leather cape and a golden necklace.
- The color of the Goblin's loot sack changes every other level
(dark brown at level 1, striped dark and light brown at level 3, light
brown at level 5 and 6).
- Trivia
- Goblins are the main antagonist in the Single Player Campaign,
despite the fact that you can train them as part of your army. Your own
Goblins seem to have no compunction about attacking their NPC brethren.
- When you tap on the Army Camp the Goblins stationed there all turn and look to their left for a brief moment.
- Goblins and Minions are the fastest moving units.
- You can have a maximum of 240 Goblins at one time in a full complement of fully upgraded Army Camps. This number increases to 270 if you include the 30 that can fit into a fully upgraded Clan Castle.
- The Goblins from the Single Player Campaign look the same as the Goblin troop; however, they don't attack and immediately retreat into the Town Hall, in a similar fashion to the Villagers and Builders in players' bases.
- While Goblins do carry a sack, any loot they steal goes
straight to your Storages just like it would from any other unit's
attack.
- They are the only known unit to be faster than a Spring Trap. This does not mean it´s the only troop that is not affected by the Spring Trap.
- The Goblins from the Single Player Campaign will attack defenses first, but your goblins will attack resource buildings first.
| Preferred Target
| Attack Type
| Housing Space
| Training Time
| Movement Speed
| Attack Speed
| Barracks Level Required
| Range
|
| Resources Damage(x2)
| Melee (Ground Only)
| 1
| 30s
| 32
| 1s
| 3
| 0.4 tiles
|
| Level
| Damage per Second
| Damage per Second on Resources
| Hitpoints
| Training Cost 
| Research Cost
| Laboratory Level Required
| Research Time
|
| 1
| 11
| 22
| 25
| 25
| N/A
| N/A
| N/A
|
| 2
| 14
| 28
| 30
| 40
| 50,000
| 1
| 12 hours
|
| 3
| 19
| 38
| 36
| 60
| 250,000
| 3
| 2 days
|
| 4
| 24
| 48
| 43
| 80
| 750,000
| 5
| 3 days
|
| 5
| 32
| 64
| 52
| 100
| 2,250,000
| 6
| 5 days
|
| 6
| 42
| 84
| 68
| 150
| 4,500,000
| 8
| 10 days |
|
| |
| |
| |
|
| Level 1 & 2
| | Level 3 & 4
| | Level 5
| | Level 6
|
- Summary
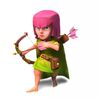
- The Archer is a ranged unit, the first such unit unlocked in the Barracks.
It is depicted as a female with pink hair and sharp eyes. She wears a
short, light green dress and matching cape, a leather belt and attached
small pouch, a quiver slung to her back and a golden ring on each of her
upper arms. Her quivered arrows are fletched with pink feathers.
- Archers have no preferred targets, attacking whatever comes within their range.
- Offensive Strategy
- Archers are very weak when under fire but have a long range and can attack over Walls. Their low health makes them vulnerable to nearly all defenses, but Mortars, Wizard Towers and even Bombs are
especially dangerous as they deal splash damage which can take out
groups of Archers quickly. This can be alleviated by placing them in
several small groups so that one or a few hits does not kill all of your
Archers.
- Archers work well when deployed in large numbers. However, it's a good idea to spread them out so that a Mortar or Wizard Tower cannot kill them with a single shot. This strategy is called an Archer Rush.
- Due to the Archer's low health, some people find it useful to use Barbarians or Giants as a distracting unit or "meat shield" in order to draw fire away from them.
- Using only Archers and Barbarians has a very small chance of wiping a base, or even getting 2 stars (50% damage and destroyed Town Hall).
- The Mortar's blind spot is smaller than the Archer's range, so they aren't safe from any tower except Air Defenses.
- Another strategy is to try out dead spots. Deploy one Archer
for each building and see if you get hit by any defenses. With this
tactic you will be able to destroy a lot of buildings and get a lot of
loot without much loss. Additionally you can go for the 50% damage and
get one star by taking risks and destroying a few more buildings.
- They are good to take out lone buildings, e.g. Builder's Huts placed far away to prevent full destruction.
- Putting a handful of Archers on one defensive building where
only that building can attack the group is usually successful, but
should only be done depending on the level of both your Archers and the
defending building.
- Defensive Strategy
- She is an excellent troop to have in the Clan Castle because she can target both Air and Ground Units. Beware of lightning spell though, if enemies successfully lured out your Clan Castle troops (which is why you should put your Clan Castle in the interior), they can perish the Archers with a single Lightning Spell.
- If she is behind a Wall when enemy melee Troops without a favorite target notice her, those troops will start attacking the Wall in order to reach her. Unfortunately she will often forget to stay behind the wall and begin attacking the Troops in open space.
- Upgrade Differences
- The most notable cosmetic changes for an Archer being upgraded is the color of their hair/hood and arrow type:
- A level 1 or 2 Archer has pink hair and quiver full of pink arrows.
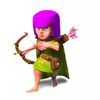
- A level 3 or 4 Archer has purple hair and quiver full of flaming arrows.
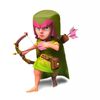
- A level 5 Archer has a green hood, pink hair, and a quiver full of flaming arrows.
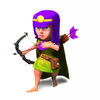
- A level 6 Archer has purple hair, a tiara, and the arrows have
purple fletching. It also has its cape turns from the color green to
black.
- Trivia
- It's unknown why she has a small pouch on her belt, though it's likely to store supplies such as bow strings and water.
- As of now, the polls are showing that this unit is the most favored by the players when raiding a base. Consequently Supercell increased the prices to upgrade them.
- Archers are generally recognized as the most popularly requested troops for the Clan Castle.
- When you tap on the Army Camp, the Archers stationed there all pump their right fist into the air three times.
- You can have a maximum of 240 Archers at one time in a full complement of fully upgraded Army Camps. This number increases to 270 if you include the 30 that can fit into a fully upgraded Clan Castle.
- On 17 March 2013 there was a Clash-Off competition involving Archers and Valkyries:
-
-
- "Chief, it’s time for a CLASH OFF!! Archer or Valkyrie? Pick your favorite and tell us why - you could win 1000 gems!!! We'll announce the winner tomorrow!"
-
-
- The winning comment was made by Paula Shayne Lao Olbes, supporting Archers. She said:

| Preferred Target
| Attack Type
| Housing Space
| Training Time
| Movement Speed
| Attack Speed
| Barracks Level Required
| Range
|
| None
| Ranged (Ground & Air)
| 1
| 25s
| 24
| 1s
| 2
| 3.5 tiles
|
| Level
| Damage per Second
| Hitpoints
| Training Cost
| Research Cost
| Laboratory Level Required
| Research Time
|
| 1
| 7
| 20
| 50
| N/A
| N/A
| N/A
|
| 2
| 9
| 23
| 80
| 50,000
| 1
| 12 hours
|
| 3
| 12
| 28
| 120
| 250,000
| 3
| 2 days
|
| 4
| 16
| 33
| 160
| 750,000
| 5
| 3 days
|
| 5
| 20
| 40
| 200
| 2,250,000
| 6
| 5 days
|
| 6
| 22
| 44
| 300
| 7,500,000
| 7
| 14 days |
|
| |
| |
| |
|
| Level 1 & 2
|
| Level 3 & 4
|
| Level 5
|
| Level 6
|
- Summary
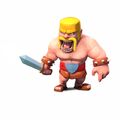
- The Barbarian's appearance is a man with an angry, battle-ready
expression, close-cropped blond hair and a long yellow handlebar
mustache. He wears a brown kilt with a leather belt and a steel
shield-shaped buckle, which indicates that he may be a Scottish warrior.
He also has spiked wristbands on both arms, as well as a short
broadsword in his right hand. He wears a pair of leather sandals on his
feet.
- The Barbarian is the first unit unlocked in the Barracks.
- Offensive Strategy
- Archers and Giants are commonly used to support Barbarians.
- If you want all your barbarians to attack 1 wall instead of
multiple ones, you can place one barbarian to target a wall, and then
drop the rest of your barbarians, and then they should all attack the
same wall.
- Barbarians are weak when breaking through walls and a group
will tend to target multiple walls (if you do not follow the strategy
above) so it is advisable to use Wall Breakers or high damaging troops such as P.E.K.K.As to break through.
- Players sometimes spread Barbarians to avoid them all being picked off in one group by a Mortar or a Wizard Tower as these Defensive Buildings deal splash damage.
- Large hordes of Barbarians are very effective as they will
quickly destroy anything in their path. This is balanced by the fact
that the Barbarians are not very effective under heavy fire from splash
damaging buildings.
- The Barbarian has no preferred target when attacking; he will simply attack the closest building to him.
- They are good to take out lone buildings, like builders huts placed far away to prevent full destruction.
- If a Mortar is exposed and otherwise undefended, a single Barbarian can easily destroy it as Mortars cannot target troops which are close to them.
- Barbarians can act as a "poor man's" distracting troop in a similar fashion to Giants; while they have far less health individually, a group of five Barbarians (the same housing requirement as one Giant) has approximately 75% of the health as a similar-level Giant
while doing nearly 4 times the damage (and costing approximately 20-25%
of the elixir to train). Note that this strategy is far less effective
if splash damage defenses are in the area, as they will damage all
Barbarians at once and destroy them relatively quickly.
- Barbarians, along with Archers, are normally used in swarms to defeat Barbarian King or the Archer Queen. This is because they are cheap and the fact that Heroes attacks are single targeted.
- Also, Barbarians along with Archers
are used close to their matching Hero type once the Hero reaches level
5, as the Hero's special ability will be applied to all similar troop
types that are around it and will give the troops the same power as the
Hero.
- Defensive Strategy
- Barbarians are an excellent choice for Clan Castle
troops as they have relatively high health and damage for single
housing space troops. They are capable of soaking up a significant
amount of damage, delaying attackers and allowing your fixed defenses take care of the rest. Because their housing space is only 1, you will be able to have a large amount of them in your Clan Castle, making them more time consuming to lure out.
- Upgrade Differences
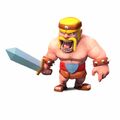
- Upon reaching level 3 the Barbarian gains a leather headband with a silver spike and a larger sword.
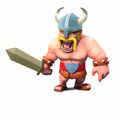
- At level 5, the Barbarian receives a Viking helmet and a bronze broadsword.
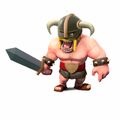
- At level 6, the Barbarian wields a dark iron broadsword and
sports a mighty horned helmet, complete with face-mask. All
accoutrements (kilt, belt, wristbands and sandals) turn a darker shade
of brown as well. He also wields his sword with one hand when
stationary.
- Trivia
- Of the three Tier 1 troops (Barbarian, Archer, Goblin) the Barbarian has the highest health and does the second-most damage (Goblins of similar level have higher damage per second). He is also the slowest-moving but fastest to train.
- When you tap on an Army Camp, all the Barbarians stationed there will briefly raise their swords.
- Along with the Goblin, the Barbarian is the cheapest Elixir-based troop in the game.
- You can have a maximum of 240 Barbarians at one time in a full complement of fully upgraded Army Camps. This number increases to 270 if you include the 30 that can fit into a fully upgraded Clan Castle.
- When Barbarians become aware of hostile units such as Clan Castle reinforcements and Heroes (generally
by being attacked or being close to another unit being attacked), they
will stop what they are doing and attack them. Once the enemy troops have been defeated they will proceed to attack the nearest buildings from their current location -- they will not (necessarily) return to their prior target.
- The Barbarian is considered to be the primary troop of Clash of Clans due to it representing the logo for the app.
| Preferred Target
| Attack Type
| Housing Space
| Training Time
| Movement Speed
| Attack Speed
| Barracks Level Required
| Range
|
| Any
| Melee (Ground Only)
| 1
| 20s
| 16
| 1s
| 1
| 0.4 tiles
|
| Level
| Damage per Second
| Hitpoints
| Training Cost
| Research Cost
| Laboratory Level Required
| Research Time
|
| 1
| 8
| 45
| 25
| N/A
| N/A
| N/A
|
| 2
| 11
| 54
| 40
| 50,000
| 1
| 6 hours
|
| 3
| 14
| 65
| 60
| 150,000
| 3
| 1 day
|
| 4
| 18
| 78
| 80
| 500,000
| 5
| 3 days
|
| 5
| 23
| 95
| 100
| 1,500,000
| 6
| 5 days
|
| 6
| 26
| 110
| 150
| 4,500,000
| 7
| 10 days
|

| 
| 
|
| Level 1-9
| Level 10-19
| Level 20+
|
- Summary
-
The Archer Queen is basically a stronger, more powerful version of the Archer. She is automatically summoned once the Archer Queen Altar is constructed. This costs 40,000 Dark Elixir.
- The Archer Queen is an immortal unit, so she only has to be
summoned once. However, if she is injured or 'falls' in battle, she must
regenerate her health by sleeping for a period of time before she can
be used again. If you attack a village while its Archer Queen is still
regenerating, the Altar will be empty.
- The amount of time she sleeps to regenerate is directly
proportional to the health she has left at the end of the battle. So if
she is not damaged then she is ready to fight immediately; however, if
she falls in battle or even gets hit, then she must sleep for some time
to regenerate.
- The more the Archer Queen is upgraded, the more time it will take to fully regenerate her health.
- You can temporarily quadruple the hero's healing rate for 2 hours by spending 10 Gems.
- Offensive Strategy
- She has better range than an Archer (1.5 tiles more) so a good strategy is to place a group of Giants or P.E.K.K.As as a meat shield, then a group of Archers
and last an Archer Queen. That minimizes the chance of her being
defeated or even hit and may allow you to use her many times in a row.
- Defensive Strategy
- The Archer Queen can be placed next to the Barbarian King to
fight together, this will allow for more power. Alternatively they can
also be spaced out to cover a larger range; this depends on what is
suitable for every village.
- The Archer Queen is more suitable for defense than the Barbarian King, as she has longer range, attacks faster and can target air units.
- Trivia
- Added with the Hero Update on 10th January 2013.
- The Heroes' prices to upgrade and damage against walls changed in an update.
- The Heroes' healing time changed in the same update.
- When you tap on her she will yell and stand still for a moment.
- Holds a modified X-Bow which doesn't shoot Elixir.
- Tap on the Archer Queen, not her altar, to view her attack radius.
- When the Archer Queen is upgrading you can't use her on the battlefield.
- The Archer Queen shoots 3 rapid arrows per shot (they cannot affect multiple targets, however).
- She shoots farther than a normal Archer (5 tiles instead of 3.5).
- Her appearance changes as she levels up. At level 10 her crown turns to gold, and at level 20 the stock of her X-Bow turns golden as well.
- When she is injured or "fall" in a battle (attack and defense),
a small explosion will occur, she will yell in pain and a red beam will
shoot to the sky. After that, she will stand still, having a "dizzy"
animation.
- The Archer Queen's first few upgrades cost less than the cost to buy her.
- The Archer Queen is basically the counterpart of the Barbarian King, and vice versa.
- The Archer Queen is not affected by the Spring Trap.
| Preferred Target
| Attack Type
| Movement Speed
| Attack Speed
| Range
| Search Radius
|
| None
| Ranged Ground and Air
| 24
| 0.75s
| 5 tiles
| 13 tiles
|
Royal Cloak Ability
| Ability Level
| Summoned Units
| Ability Time
|
| 1
| 3
| 2.5s
|
| 2
| 4
| 3.0s
|
| 3
| 5
| 3.5s
|
| 4
| 6
| 4.0s
|
| 5
| 7
| 4.5s
|
| 6
| 8
| 5.0s
|
| 7
| 9
| 5.5s
|
| 8
| 10
| 6.0s
|

| 
| 
|
| Level 1-9
| Level 10-19
| Level 20+
|
- Summary
- The Barbarian King is basically a larger, more powerful Barbarian. He is automatically summoned once the Barbarian King Altar is constructed, which costs 10,000 Dark Elixir.
- The Barbarian King is an immortal unit, so he only has to be
summoned once. However, if he is injured or falls in battle, he must
regenerate his health by sleeping for a period of time before he can be
used again. If you attack a village while its Barbarian King is still
regenerating, the Altar will be empty.
- The amount of time he sleeps to regenerate is directly
proportional to the health he has left at the end of the battle. If he
is not damaged (or is fully healed before the battle ends), then he is
ready to fight immediately; however, if he falls in battle or is
wounded, then he must sleep for some time to regenerate.
- The more the Barbarian King is upgraded, the more time it will take to fully regenerate his health.
- You can temporarily quadruple the hero's healing rate for 2 hours by spending 10 Gems.
- Offensive Strategy
- When attacking, he can be deployed just like any other unit.
When his health is lowered he must sleep to recharge before he can be
used again. The regeneration time is directly proportional to how much
health he must recover. He may be instantly brought up to full health
with Gems.
- He is best used with Healer and Archer support.
- He is also good for helping to destroy the buildings of a village after most or all defenses have been destroyed.
- The Barbarian King can be easily swarmed by a group of Archers or Barbarians as he only attacks one target at a time and has slow attack speed.
- Many players place a few troops in the Barbarian King's radius to lure him out, and then use a group of Archers or Barbarians to attack him.
- Defensive Strategy
- The Barbarian King has two modes: he can be set to "Sleep", which will put him to sleep on his Altar
and cause him to ignore any attacks to your village, or "Guard", which
will put him on patrol around your base and cause him to engage any
enemy Troops that come within his targeting range during a defensive battle. In "Sleep" mode he will not appear on the battlefield at all.
- Though he is very strong on offense, he only attacks one target
at a time on defense which makes him easy to kill with multiple units.
- It is a good idea to place the Altar in the middle of a group of storages or other areas you wish to protect.
- The Barbarian King cannot damage air units (though the Archer Queen does).
- Trivia
- Added with the Hero Update on 10th January 2013.
- The Heroes' upgrade cost, regeneration time and damage against Walls were changed in the May 2013 Update.
- Sometimes, when the Barbarian King turns, his shoulder guard
appear on his other arm, and his sword appears on the opposite arm as
well.
- If you move the Barbarian King altar when he is sleeping, he will get up and walks to his altar, then sleeps again.
- Pulse of waves can be seen when the Barbarian King is awake after fully regenerating his health.
- The Barbarian King can be healed by Healing Spell or Healer while battling; however, this healing occurs at 50% of the rate of that of normal Troops.
- Every slash he makes on a building or unit creates a mini explosion.
- Upgrading the Barbarian King's level requires a builder.
- When you tap on him he will yell and stand still for a moment.
- Tap on the Barbarian King (not his Altar) to view his attack radius, as the Barbarian King "patrols" his area moving constantly.
- When he 'falls' in battle, an explosion occurs and a bright
beam of light is sent up into the sky temporarily. He is then seen
standing dazed for the remainder of the battle.
- If a level 40 Barbarian King is used with a level 5 Rage Spell, it will destroy a level 10 Town Hall in 4 seconds.
- While the Barbarian King is being upgraded you can't use him on the battlefield.
- Each successive upgrade of the Barbarian King (up to level 30)
adds approximately 4% health and damage, but also adds a constant four
minutes to the total regeneration time. As a consequence, the Barbarian
King's regeneration rate changes as it levels up. Initially the
Barbarian King's regeneration rate slows down each level, going from
1,500 hit points per hour at level 1 to 1,332 per hour at level 11.
Beyond level 11 the rate begins to climb again, eventually reaching
1,500 hit points per hour again at level 26, and 1,595 at level 30.
- Beyond level 30, the Barbarian King gains additional health and
damage at each level (approximately 2% of each), but his total
regeneration time stays constant at 3 hours. This significantly
increases the Barbarian King's regeneration rate at levels beyond 30,
ultimately reaching 1,900 per hour at level 40.
- The Barbarian King will wander in circles around his Altar, occasionally seen jumping over walls as well.
- The golden metal gauntlet on the Barbarian King's right hand is
not seen when he is first summoned onto your village. Instead, it is
the same grey color as the color of his shoulderguard.
- His appearance changes as he levels up. At level 10 his
gauntlet changes from grey to gold. At level 20 his shoulderguard gets
a golden ring and spike.
- The Barbarian King is basically the counterpart of the Archer Queen, and vice versa.
- The Barbarian King is not affected by the Spring Trap.
- Even though the Barbarian King should sleep after battle, but
he starts his regeneration countdown the second he gets wounded in
battle, but doesn't recover health until the battle ends.
- Starting at level 5, the Barbarian King obtains an ability called Iron Fist. This summons up to ten Barbarians and gives the Barbarian King and any surrounding Barbarians increased damage and speed. This does not stack with the Rage Spell.
- When The Iron fist is activated the Barbarian King Gains A Temporary Mini Rage Spell around him.
- Iron fist does not affect any other troops except the Barbarian King and Barbarians.
| Preferred Target
| Attack Type
| Movement Speed
| Attack Speed
| Range
| Search Radius
|
| None
| Ground
| 16
| 1.2s
| 1 tile
| 13 tiles
|
Iron Fist Ability
| Ability Level
| Damage Increase
| Speed Increase
| Summoned Units
| Ability Time
|
| 1
| 20%
| 18
| 3
| 10s
|
| 2
| 24%
| 19
| 4
| 10s
|
| 3
| 28%
| 20
| 5
| 10s
|
| 4
| 32%
| 21
| 6
| 10s
|
| 5
| 36%
| 22
| 7
| 10s
|
| 6
| 40%
| 23
| 8
| 10s
|
| 7
| 44%
| 24
| 9
| 10s
|
| 8
| 50%
| 25
| 10
| 10s | | | |


")


")